Calcium Sulphate screeds, or as they are more commonly known as Anhydrite screeds are becoming increasingly popular within the Tiling Industry. They are usually pump applied in domestic and commercial projects and are chosen because of their speed of application, minimal shrinkage cracking, high strength…to name but a few of the advantageous characteristics. They are designed for use in dry environments only.
However tilers… BEWARE you cannot treat them in the same way you would a traditional sand: cement screed. Calcium Sulphate based screeds are a mix of screeding sand and binder and therefore can look very similar to a sand: cement screed, usually they are lighter in colour, almost white, which is a good indication, although this is not always the case. If you are unsure and cannot obtain confirmation from the company responsible for laying the screed, the only guaranteed way of knowing is to carry out a chemical analysis of a sample of the screed. A Calcium Sulphate screed is characterised by high CaO and SO₃ content.
Once you have determined that you have a Calcium Sulphate screed and this can be in the form of natural anhydrite, thermal anhydrite, alpha hemi-hydrate or a combination of these, there are steps you must follow;
Drying Times:
These screeds, given ideal drying conditions, dry at a rate of 1mm/day up to a maximum thickness of 40mm and then at a rate of ½ mm per day for thicknesses above this.
Force drying the screed with the use of under-floor heating systems, will also enhance the drying process. This may be permitted 7 days after the initial laying.
The screed must be adequately dry before any application of impermeable floor coverings (e.g. ceramics) typical requirements will be 0.5% water by weight, which equates to approximately 75% relative humidity.
Laitance removal:
During curing a weak, friable film usually forms on the surface – laitance. This will also reduce the rate at which the moisture can escape, therefore prolonging the drying time. Removal of this film is essential, and can be done by abrading, milling, or shot-blasting. Once the surface has been removed, thoroughly vacuum to remove loose parts and dust. This process can be completed after 3 -10 days of application using the recommended equipment. Opening the surface, will also assist the screed to dry.
If there is any doubt whether the screed is dry, contact the manufacturer.
Floor Preparation:
The screed must be primed, which will act as a barrier to avoid any adverse chemical reaction e.g. ettringite formation between the Sulphate in the screed and cement in the cementitious adhesive or levelling compound.
This can be done with two neat coats of PALACE Anhydrite Sealer.
Do not allow any puddles to form and when the primer is dry your tiles or stone can be confidently fixed using a PALACE adhesive suited to your size and type of tile.
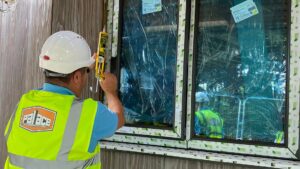
We have recently experienced first-hand a failure where the correct identification of a screed was not made. One of our Sales Team was asked to visit a site where a PALACE adhesive had been used to fix tiles which were consequently de-bonding.
The contractor stated that “the screed looked milky compared to other screeds” and instead of further investigation into the type of screed, decided to seal the floor with 1 coat of PVA and commenced fixing.
The screed was identified as being Anhydrite and because it had not been prepared or sealed correctly, evidently the tiles de-bonded.
This was an expensive error for the contractor, however with our expert guidance and products to “do the job right” one he will not make again.
For full information on the PALACE Anhydrite Sealer, please consult the relevant Technical Datasheet, which can be viewed or downloaded from our ‘New Palace Website’ at www.palacechemicals.co.uk/shop/anhydrite-sealer where you can see details of the products and our technical data sheets.